torsdag 24 oktober 2013

A Santa's card (DT MiC)


Hi!
Today's DT-card for Make it Crafty is made with two stamps: Elf Delivery System and Cheeky Santa. I have also used a lot of new dies which I have loved using on this card! For the card's shape I have used my new very large die from Craft-Too XL Nesting Frame 4 with a lot of sizes (16!!) 2,5*2,5 cm up to 14*14 cm. The gorgeous marine blue paper behind all the embellishments are from K Designs Cold Winter Paper Stack and this particular one is called Cold Night. 


I have coloured my images from Make it Crafty with Distress Ink Pads. Colours and other materials used:
Santa's clothes: Barn Door, Black Sooth, Glossy Accent and Iced glitter
Santa's belt and bell: Squeezed Lemon, Scattered Straw
Elves' clothes: Mowed Lawn, Black Sooth, Barn Door, Squeezed Lemon
Rocket: Barn Door, Black Sooth, Inka Gold Platinum

I have used Frantage Enamel Shabby Blue around the image and I must say that i just love using Frantage... It lifts everything up! :)


Here's a close-up on one of the Poinsettias I have made with Spellbinders Shapeabilities Dies Layered Poinsettias. I have used white paper for the flowers and embossed it in the Bigshot and inked it with Faded Jeans Distress Ink. I finally painted Inka Gold Platinum on the embossed parts and put on some Glossy Accent and glitter on the three dots in the middle of the flower. The leaves are made with a die from Craft-Too called Holly Die. I have chalked the edges with Vintage Photo Distress Ink and also painted it with Inka Gold Platinum as I did on the flowers.


I was SO happy to find this beautiful tree, a very special Christmas tree, since it is swirly and embossed and I just love it :) I have painted Inka Gold Platinum here too and chalked the edges of the tree with Vintage Photo Distress Ink. The snowflake is cut with a Joy of Craft Die and chalked with Vintage Photo Distress Ink as well. I dotted some Glossy accent here and there and then put on some sparkling glitter on the snowflake. The other snowflake on the stamped image is cut with a punch from Martha Stewart and also chalked with Vintage Photo Distress Ink.


This is truly one of my favourite items to have on my cards now.. This frame is made with extremely light weighed clay from Martha Stewart and the frame is included in a Starter's Kit from MS. It was white from the beginning and I have inked it with Faded Jeans Distress Ink and then painted it too, with Inka Gold Platinum. I used stickers to make the text that says "Merry Christmas" in Swedish, and then put on some Crackle Accent (LOVE!).


I just have to give a little cred for all the beautiful dies that I have used in this card to Scrappweb.se or Porslinsblomman as it also is called, I LOVE the range of dies that they have and I can truly say that they stand out with their gorgeous dies from varies of brands!

That's all for today and I hope to see these stamps on one of your holiday cards soon ;)

xoxo Madeleine

lördag 19 oktober 2013

Zoe in a Chocolate card (DT MiC)

Hi everyone!

Today I am blogging a special card folding - a Chocolate card (tutorial)! This is a beautiful way of cheering someone up, or giving appreciation to someone you care about! I have also had a lot of fun colouring up "Zoe", a stamp that comes with a long hair colouring tutorial that Zoe from Make it Crafty has created and you can buy it here. I have also used the gorgeous papers from KDesigns which is called Purple Dreams.


The textstamp is in Swedish and comes from Vildastamps, it says "Happiness is to have friends like you". Beautiful, right? :) I have cut the circle with a die from Nellie Snellen. The text is stamped with Picked Raspberry Distress Ink and then I have put on Perfect Pearl powder to make it shimmer. The big and beautiful butterfly is a gift from a friend! 

Gorgeous Zoe by Krista Smith for Make it Crafty is coloured with both Distress Ink pads and watercolourpencils from Faber Castell. All the flowers come from WOC. I have cut and embossed her with a Spellbinders Nestabilities Gold Labels Four.
Hair: Squeezed Lemon, Scattered Straw, Wild Honey
Face/Skin: Faber Castell watercolourpencils and Vintage Photo, Evergreen Bough, Worn Lipstick
Dress: Picked Raspberry, Black Sooth


Thank you for stopping by, hope you'll try Zoe's great tutorial, where you not only get a very pedagogic tutorial, but also this beautiful stamp by Krista Smith for Zoe Mitc.

Have a lovely day!
Xoxo Madeleine

tisdag 8 oktober 2013

My first entries to challenges! (SC Fancy)

Hi Everyone!

I am very excited, because this is the first time ever that I will enter not just one, but two challenges - Love & Live Crafts "Pink" theme and Wild Orchid Crafts "Pretty Pastels" with one of my cards!


I have used gorgeous Fancy from Saturated Canary and I had a blast colouring her up! The card is an easelcard, that was some time ago I made one of those!I have used Distress Ink pads to colour her.

Hair: Scattered Straw, Vintage Photo, Walnut Stain
Face and skin: Spun Sugar, Antique Linen, Scattered Straw, Vintage Photo
Dress and ribbon: Spun Sugar and little Seedless Preserves
Leaves: Shabby Shutters

I have used Frantage Enamel Shabby white around Fancy and chalked the edges with a little Picked Raspberry Distress Ink. I have also used a Pearl-pen ("Paper Pen") to bling her hair a little bit :) All the flowers are from Wild Orchid Crafts. 


Here you can the a couple of gorgeous feathers from Magnolia, awesome die!! I have chalked the egdes with Picked Raspberry here too. The little paperclay frame is made with a mold from a store on etsy.com. The butterfly charm and key charms is from a store at aliexpress.com and the other charms are purchased from Swedish stores (but I think you can find them anywhere ;) )


The card's shape is made with Spellbinder Nestabilities Labels One and the little square inside is cut with a die from Spellbinder Nestabilities Decorative Labels Eight. I have inked it a little bit with Picked Raspberry Distress Ink. The gorgeous paper underneath all the embellishments are from K Designs. I have used the same paper to the little butterflies inside the card.


Just for the record, I am entering these challenges with my card:

Wild Orchid Crafts: Pretty pastels

Wish me luck! ;) 

xoxo Madeleine

måndag 7 oktober 2013

Dreamy Eyes-challenge (DT Make it Crafty)

Hi!

Today I am blogging my inspirational card to the new colour challenge we have over at Make it Colourful. This time you can take on the Easy challenge, which is to colour eyes or the Hard challenge, which is to add reflections in the eyes. My inspirational card is for the Hard challenge. I have to say it was actually frightening at first, it felt like it was way out of my league to even try (which I know a lot of the girls in the FB group felt too), BUT, I have to say it wasn't really THAT hard when I started out :) You may have to give it a go a couple of times before you get it right. That's what I did ;)

Here's my card! I have used gorgeous Melyssa for this challenge. And something else is new here... I have FINALLY used my gorgeous papers from K Designs. I have been collecting them since June I think, and they are sooo pretty and cool that I really didn't want to use them because then they would be gone.. This is a typical scrap-nerd thing haha :)


I bought the Martha Stewart Crafter's Clay Starter Kit and made this beautiful frame with the very light-weighed clay. It's very wet and easy to use, and it feel a little bit like rubber when it's dry. I have chalked it a little bit with Forest Moss Distress Ink pad and then I have painted a little Inka Gold Platinum on it. The text is something I got creative with and tried to find my own little saying. I tried out Crackle Glossy Accent and I LOVE it!!


And here she is, gorgeous Melyssa. I bought watercolour pencils from Faber Castell to make the skin on my images look a little more real, but I have actually worked with both them and Distress Ink pads on the skin. The rest of her is coloured with Distress Ink pads. The little corners are also made with clay and molds from the MS Crafters Clay Starter Kit. I have also used Platinum Stickles around the frame of Melyssa, a new favourite thing to use on my cards!

Skin: Faber Castell pencils
Eyes: Black sooth, Forest moss, Faded jeans, Salty ocean
Hair: Scattered straw, Vintage photo, Walnut stain
Lips: Derwent watercolour pencils.


A little close-up at the flower arrangement. I have made one of my hand made roses in the corner and I used Forest moss Distress Ink pad to ink it. I have also sprayed Perfect Pearl mist on it.


That's all for now, I hope you dare to try out the hard challenge this month, it will be worth it! Remember that a challenge is just that, a challenge to make you grow and develope your skills ;) Good luck!

xoxo Madeleine

lördag 5 oktober 2013

Some Graffiti-time!! (DT Make it Crafty)

Hello Everyone!

Today I am showing you a scene I made with some of the new characters from the stamp series Urban Street over at Make it Crafty, and a graffiti-stamp from Little Miss Muffet!! If you don't know it yet, Make it Crafty and Little Miss Muffet made a little release of these new stamps together and there's a challenge over at the Graffiti Party-blog, where you get discount on the new stamps and a freebie-pack!! Come on over and join us ;)


This is my card for some inspiration! I have used Keisha and Nico and put together a scene with the Urban Collections stamps and I LOVE it! I have used Distress Ink Pads to color it all up and I must say I have put in both time and effort in making this as good as I possibly could. :) Hope you like it! 


Here's Keisha. I love her! She's so chill and gorgeous at the same time ;)


And here you have Nico. He's also very cool and chill ;) I love the cool gesture he has, it really fits the graffiti I chose, and the stereo beside him. 


And here's the Graffiti from Miss Muffet. Isn't it cool!?


I can't WAIT to see your cards and coloring, hope you'll have fun with these new and old stamps! :)

xoxo Madeleine


tisdag 1 oktober 2013

My first Christmas-card (DT Make it Crafty)

Hi everyone!

After a week of cold and coughing I am back with a new DT-card for Make it Crafty. I have had a LOT of fun with this scene and I am truly wishing that if you haven't tried to colour up a scene, dare to try! It's so much fun and you get to be so very proud of your work afterwards. :) 

This time I have used these stamps; Fairy Twinkles, Tinkles and the Christmas Elves House. And this card does not only containing this month's 1$ digistamp (Twinkles), but I am also aiming to inspire you to try out our new Sketch-challenge in the Make it Crafty- fan group!


And this is my card, with a little Christmas theme as you can see ;) I have used a gorgeous snow-die from Joy of Craft at the top of the card. The little snowflakes are cut with a punch from Martha Stewart and chalked with Vintage Photo Distress Ink. I have also used gold-coloured punchinella behind the big doily. 


Here's little Tinkles. I have coloured her with Distress Ink Pads;
Suit and hat: Mowed Lawn, Faded Jeans, Barn Door
The belt and shadows: Black Sooth
The knot: Barn Door
The bells: Squeezed Lemon, Scattered Straw, Vintage Photo
Hair: Scattered Straw, Vintage Photo, Walnut Stain
Face: Faber Castell pencils for skincolour


And here's Twinkles, the 1$ digi stamp of October.
Hair: Scattered Straw, Vintage Photo, Walnut Stain
Eyes: Mowed Lawn
Dress: Barn Door, Mowed Lawn, Faded Jeans, Black Sooth
Bells and wings: Squeezed Lemon, Scattered Straw, Vintage Photo
Hair: Scattered Straw, Vintage Photo, Walnut Stain
Face: Faber Castell pencils for skincolour


A close-up at the shoe-house, or Christmas Elves House as it is called :)
Colours: Scattered Straw, Vintage Photo, Walnut Stain, Black Sooth
I have painted the snow on the house with a very light grey watercolor pencil from Faber Castell and I also used a glitter pencil at parts of the house.

As you can see I have created a snowfall with the marvelous Frantage Enamel Shabby White. The text is cut with a beautiful die from Roxstamps and means "Merry Christmas" in Swedish. I have chalked the edges of the lighter paper under the doily.


That's all I had to show for this time. Wishing you a lovely day!

Xoxo Madeleine


söndag 29 september 2013

A Christening card with Sleeping Baby Tilda

Hi Everyone!

I got a comment on my blog earlier last week, from a woman who wanted me to make a card for a Christening she was about to attend. This is actually my first commission outside my acquaintance, so guess if I was happy!? :D

Here's the card!


I have used Sleeping Baby Tilda for this card and I colored her with Distress Ink Pads. I have used Frantage Enamel Shabby White around her and glittered her angelwings with some Crystal stickles. The flowers are form Wild Orchid Crafts. In the bottom you can see a little glass bottle and I have put a little piece of paper in it with the girl's name, Ellie. I have tied a ribbon around the bottleneck and put a tiny feet-charm in it. Also, for this card I have made handmade purple rose which is in the left corner! I have inked it with Dusty Concord Distress Ink and sprayed it with Perfect Pearl mist to make it shimmer.


I have stamped "På Dopdagen" (which means "On the Christening Day" in Swedish) with purple cateye-color and put some Perfect Pearl powder on it before it dried. The text stamp is from Vildastamps. In the left corner you see a a corner made out of clay, I just bought the Martha Stewart Frames Borders Starter Kit and LOVE it! Although I thought the clay would be a little heavy, but it's almost as light as feathers (almost!)!


Here's a better close-up at the embellishments. I have used a Martha Stewart punch for the white lace-like edge to the right. I have also sewed stitches by hand around the designpaper from Papermania "Summer bloom".


Thank you so much for stopping by, I wish you a very nice day! :)

xoxo Madeleine

torsdag 19 september 2013

Witchy Wanda in bright moonlight (DT Make it Crafty)

Hi everyone!

Today I am blogging a scene I made with Witchy Wanda and Eerie Scene! I went all in on this one and tried experimenting without any fear of how it would turn out. And then it turned out pretty great I think! :) This is on of my first scenes I've made ever and I can tell you that I am very excited to work this way!

This is my card for this week :) I have colored it up with Distress Ink Pads.


Boy, did I work with Witchy Wanda and the shading or what!? It was a great challenge to make her look "nighty" and I started out coloring her from dark (shadings) to bright as I usually do, but then I realized, something doesn't quite add up... So I started filling the bright parts with some Scattered Straw Distress Ink (yellowish color) and then it all just came together! I really feel I succeeded with the shadings and the warmth from the fired up moon.. :)


Here's the pumpkins, which I am very pleased with how they turned out. The camera doesn't make them fair enough, the colors are more intense in reality.


That's all ladies and gents! I hope I have inspired some of you to try out this gorgeous scene and the Wanda-stamp for the Halloween feast!

Take care now!
Xoxo Madeleine

söndag 15 september 2013

Happy birthday! (Saturated Canary Princess Rose Red)


Hi Everyone!

Today I'm back with a card with one of the gorgeous stamps from Saturated Canary, Princess Rose Red. I think she's adorable, don't you? :)

Here's the card!


And here she is, the beautiful princess.. I've colored her completely with Distress Ink Pads. I have stamped around her with stamps from Panduro Hobby.


Here's a corner I've made with paperclay and I colored it up with a little Inka Gold "Platinum" to make it shimmer. I didn't want it colorful since I wanted the beautiful designpaper from Papermania "Summer Bloom" to get more attention. The stamp "happy birthday" is from Some Odd Girl. I've chalked the edges with a little Picked Raspberry Distress Ink on the sign.


The white butterfly is cut with a die from Memory box and the swirls are cut with a die from Die-Namic.

That's all for day, hope you're having a great Sunday!!

Xoxo Madeleine

fredag 13 september 2013

A wedding card (DT Make it Crafty)

Hi everyone!
Today I am back and blogging another card for the fabulous FB DesignTeam of Make it Crafty! This time I have made a weddingcard, since I have been longing for to make a card with this beautiful bridal couple, that you can find here. :) I also used a background stamp, which you can find here.

This is my card!


I have stamped with a butterfly-stamp from Martha Stewart in paperclay and folded it a little. When dry, I only scrubbed a little ink from Distress Ink Pads, Spun sugar and Picked raspberry and finished with a little Inka Gold Platinum.


Here they are! The fabulous stamps from Make it Crafty :) I am so happy with how her dress and vail turned out, since I only colored with Distress Ink pads this time. I have cut the stamps with Spellbinders Nestabilities Labels Eighteen and chalked the edges with a little Vintage photo-distress. I have used a glitterpen on both stamps to glamour it up a bit. The charm with two birds are inked up with a little Inka Gold Platinum and I've filled it with Glossy Accent.


Here is a close-up on the flower arrangement. I've used stickles on them, it's called Crystal from Rangers.


Here's a stamp from Stämpelkällan in Swedish, that means "For the bridal couple". I have chalked the edges with Vintage photo-distress. I have also sewed stitches by hand on the design paper from Panduro Hobby.


That's all for today!

xoxo Madeleine


måndag 9 september 2013

My first DT-card for Make it Crafty


Hi everyone!

This is my first DT-card for the stamp-brand Make it Crafty! I got accepted as a member of their new fun Facebook Design Team and of course I am very excited!! I applied because I truly love the varies of stamps they sell, and everything doesn't look the same, so there's always something for everyone! Plus they have a lot of themed stamps and what I discovered is the biggest reason I love the brand, is their beautiful backgrounds!!! Head into to the store and check it out for yourselves ;)  

Today I am showing you a card with three different elements that you all can enjoy too! I used a Dracula digital stamp that you can get for only 1 dollar in the store! If you go and enjoy the Make it Crafty Facebook group, you will get the code needed ;) 
With this card I also show you how the sketch-challenge (in the same group) can look like. If you enter, post your card in the "Challenge # Album" in the Make it Crafty Facebook group. 
And finally this card is for inspiration to the Easy color-challenge this month, which is to use the colors black and orange on a stamp. I've made it a theme throughout the whole card :) 

This is my card!


Here's a closer look at Dracula. I've used watercolorpens from Derwent and boosted his hair and orange clothes with a little distress ink pads, Spicy marmalade and Barn door.


The sentiment is in Swedish and means "Congratulations on your birthday".  I've chalked the edges with Spicy marmalade distress ink.


Thank you for stopping by, now please join us in the Facebook Group and come and have fun with us! ;)

xoxo Madeleine

söndag 1 september 2013

Ett bokmärke med SC Thank You/A bookmark with SC Thank You

Hej!
Idag bloggar jag ett litet bokmärke i citrongult och hallonrött! :) Stämpeln kommer från Saturated Canary och heter Thank You. Eftersom denna ska fungera som ett bokmärke kräver det att dekorationerna är ganska platta, därför ser detta lite annorlunda ut mot mina vanliga kreationer!

Hi!
Today I'm blogging a bookmark in lemon-yellow and raspberry-red! :) The stamp is from Saturated Canary and is called Thank You. Since this is a bookmark, the embellishments need to be kind of flat, so this looks a little bit different from my other creations! 

Jag har färglagt henne med Derwents akvarellpennor och sedan lekt med Frantage Enamel Shabby White runtomkring.

I've colored her with watercolorpens from Derwent and played with Frantage Enamel Shabby White around her. 


Tack för att du kikade in!
Kram Madeleine

Thanks for looking!
xx Madeleine

lördag 31 augusti 2013

You are very, very, very special to me (Radiant Rectangle dies)

Hej!
Som jag längtat efter att få göra ett kort med denna nya stämpel, Nevaeh från Saturated Canary (Himlen baklänges på engelska.. ;) ) kortet är till en fin vän till mig och jag hoppas att hon ska tycka om det! Jag har gjort hela kortstommen och nästan alla utstansade bitar med Spellbinders Nestabilities Radiant Rectangles dies. 

Hi! :) 
I have been longing for to make a card with this new stamp, Nevaeh from Saturated Canary (Heaven spelled backwards! :D ). The card is for a good friend of mine, hope she likes it! I've done almost the whole card with Spellbinders Nestabilities Radiant Rectangles dies. 


Jag har färglagt henne med Derwent akvarellpennor och i håret har jag även använt distressdynor, Vintage photo och Walnut stain. 

I've colored her with watercolorpens from Derwent and also used distress ink pads on her hair (Vintage photo and Walnut stain).


Tack för att du tittade in, ha en skön dag!
Kram Madeleine

Thanks for stopping by, have a nice day!
xx Madeleine

söndag 25 augusti 2013

Vilda stamps "Lycka till på ditt nya jobb"/Vilda stamps "Good luck on your new job"

Hej på er!

Idag har jag äääntligen provat mina Radiant Rectangles från Spellbinders Nestabilities.. Det blev ett kort för Vilda stamps räkning, då de varit med och sponsrat med ett par stämplar till en Facebook-grupp "Scrapbooking - Diskussioner", där jag kommer lotta ut två fina scrappaket när vi når 200 medlemmar! Den här stämpeln, "Lycka till på ditt nya jobb" är så himla snygg och jag är riktigt nöjd med detta kort! Voilà, här är kortet!

Hi everyone!
Today I've made a card where I fiiinally used my new Spellbinders Nestabilities Radiant Rectangles dies, and I love them! This card is made for Vilda stamps, since they contributed with a couple of stamps for my group on Facebook "Scrapbooking - Discussions" (it's in Swedish). When the group reaches 200 members, I've promised to give away 2 little packages with scrap-material and now there will be a stamp from Vilda stamps in each package! The stamp says "Lycka till på ditt nya jobb" and means "Good luck on you new job", and I am sooo happy with this card! Here it is!


Tack för titten, ha en fin dag!
Kram Madeleine

Thanks for stopping by, have a lovely day!
xx Madeleine

lördag 24 augusti 2013

Ett blått grattiskort/A blue congratulationscard (Make it Crafty)

Hej!

Idag bloggar jag mitt bidrag till Make it Craftys Design Team-call, där de söker nya DT:s för deras nya team på Facebook. Jag valde att göra ett kort med Holly Rose, hon ser så käck och glad ut! Jag började med kortmakeri i februari i år och det tog mig dryga 4 månader att upptäcka Make it Craftys underbara stämplar - jag fastnade direkt! Jag var en av de lyckliga fansen som deltog med två kreationer i samband med Make it Craftys release av stämpelkollektionen "Wonderland Tea Party i början av augusti och jag är fast.. :) Här är mitt nya kort!

Hello!!

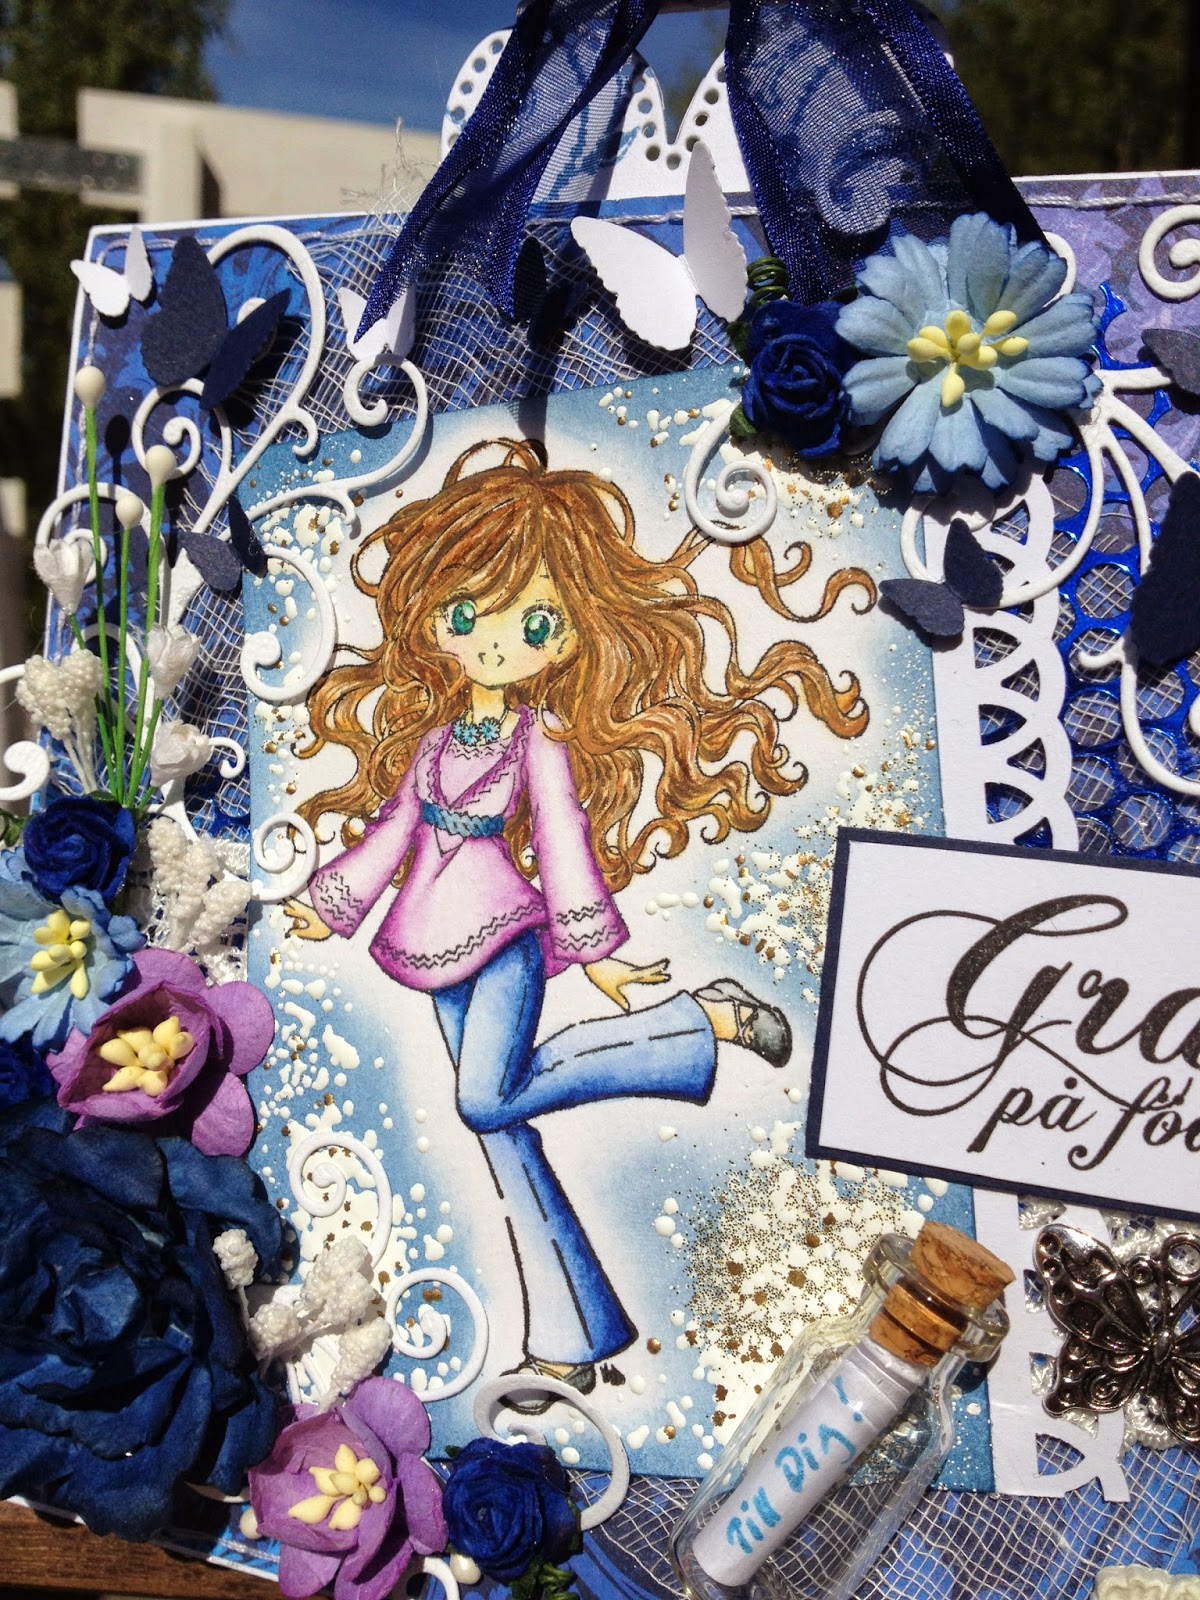
Today I'm blogging my card for the DT call Make it Crafty is having and I chose to make a card with Holly Rose, since she looks very chipper and happy! I started my cardmaking in February this year, and it took me about 4 months to discover Make it Crafty's lovely stamps - I was hooked! I was one of the lucky fans that participated with two creations in the release of Wonderland Tea Party-stamps collection earlier this August, and I'm in love.. :) Here's my new card!


Jag har färglagt Holly Rose med Derwents akvarellpennor, samt lekt med distresser (Vintage photo, Walnut stain) i hennes hår. Den blå färgen runt henne är Faded jeans-distress som jag blendat in. På det ligger Frantage Enamel Shabby White och så har jag stansat ut en bård till sidan av motivet med en kantstans från X-cut. Den största blåa blomman var vit från början och jag har färgat in den med Adirondack Color Wash Denim. Swirlsen är utstansade med en die från Die-Namic Die "Fancy Flourish".

I've colored Holly Rose with watercolorpens from Derwent and played a little with distress ink pads (Vintage photo, Walnut stain) on her hair.. The blue color surrounding her is Faded jeans-distress that I blended in, and on top of that I've put some Frantage Enamel Shabby White. To the right of the stamped picture, you can see a binding made with a punch from X-cut. The biggest rose was white from the beginning and I colored it with Adirondack Color Wash Denim. The white swirls are cut with a Die-Namic Die "Fancy Flourish".


Grattis-stämpeln kommer från Slöjd-detaljer och hörnet i lera har jag använt en silikonform till, från en butik på Etsy.com.

The "congratulations on your birthday"-stamp is from Slöjd-detaljer (Sweden) and the corner in clay is made with a silicone mold I bought from a little store on Etsy.com. 

Blommorna kommer från Wild Orchid Crafts och fjärilarna har jag stansat ut med en punch från Martha Stewart. Jag har också haft gasväv och en punchinella i blått under motivet. Stygnen har jag sytt för hand.

The flowers are purchased from WOC and the butterflies are cut with a punch from Martha Stewart. I've used a little gauze and punchinella in blue under the stamped paper. The stitches are made by hand. 

Jag har använt en tag från Magnolia som jag stämplat lite swirls-mönster med Faded jeans-distress på och knutit en rosett av blått band ovanför.

I used a tag from Magnolia that I stamped swirl-pattern on with Faded jeans-distress and I tied a knot of blue ribbon on as well. 

Den lilla glasflaskan med kork köpte jag på Ebay.com, jag älskar den!!! Det är något som händer i kortet med den, något oväntat.. Jag älskar det och jag tror inte riktigt att de 20 jag köpte kommer räcka länge.. ;) Jag har rivit sönder en bit papper, skrivit "Till dig!" på det med en glitterpenna och rullat ihop det, sen stoppat in i det i flaskan och satt korken på.

The mini glass bottle is from Ebay.com, I LOVE it!!! Something happens in the card with it, something unexpected.. I just love it, and I don't think the 20 I purchased will last very long.. ;) I've ripped a piece of paper, wrote "For you!" in Swedish on it with a glitterpen, rolled it up and put it in the bottle.


Tack för besöket! :)
Kram Madeleine

With this card I am applying for the new Design Team of Make it Crafty. 
Thanks for the visit!
xx Madeleine

måndag 19 augusti 2013

Vänskapskort/Friendshipcard

Hej!
Nu är jag tillbaka med ett nytt kort, denna gång i grönt och lila! Det har varit riktigt roliga färger att jobba med och jag har utgått från designpappret i botten för hela kortets utformning. Jag har färglagt Amy från Wee stamps, så söt! 

Hi!
Today I'm showing you a friendshipcard in green and purple! I picked up the colors from the designpaper and I'm pretty pleased with the result! I've colored Amy from Wee stamps, she's adorable!


Jag har färglagt med Derwents akvarellpennor och haft lite stickles i ballongen. Jag har även använt glitterpenna både i hennes ögon och på små detaljer i hela stämpelbilden. Runt motivet har jag smält Frantage Enamel shabby white.

I colored with watercolorpens from Derwent and used a little stickles on the balloon. I also used a glitterpen in her eyes and on small details all over the stamp. Around the stamp I've used some Frantage Enamel Shabby White. 


Tagsen är utstansade med en Magnolia-die och fjärilarna med en die från Joy of Craft. Jag har limmat fast glitter i fjärilsbården, som matchar resten av kortet ganska bra!

I've used a Magnolia die for the tags and the butterflies are cut and (dry)embossed with a die from Joy of Craft, and finally I glued some glitter on it. The glitter matches the rest of the card! 


Blomsterarrangemanget... Alla blommor kommer från Wild Orchid Crafts och löven har jag stansat ut med en lövdie från Memory Box, samt chalkat med Shabby shutters-distress.

The flowerarrangement... All the flowers are purchased from WOC and the leaves are cut with a die from Memory Box. I've chalked the edges on the leaves with some Shabby shutters-distress. 

Tack för titten, ha en fin dag!
Kram Madeleine

Thanks for stopping by and have a nice day!
xx Madeleine